
For a long time my side projects lived on other people’s computers. The code was on GitHub, the builds on GitHub Actions and the containers on whichever free service tier hadn’t changed its rules that month. Things worked up for me to a point… And then they stopped working, I was fed up with the dozens of different control panels.
So I moved the codebase and actions onto a Raspberry Pi sitting on my shelf (I was keeping it inside a box, next to the books). It runs Dokploy as the platform layer, Gitea as the Git server and the image registry and a Gitea Runner that builds images and pushes to the registry on every push. No cloud account, no public domain, no build minutes to follow. Just a board and few watts.
This article covers the setup process step by step, describing what I installed and in what order, as well as the parts that proved challenging.
What the setup looks like#
%%{init: { "sequence": { "mirrorActors": false } } }%%
sequenceDiagram
autonumber
actor Dev as Developer
participant Gitea as Gitea (Git + Actions)
participant Runner as Gitea Runner
participant Reg as Gitea Container Registry
participant Dok as Dokploy
participant Docker as Docker / Traefik

    Dev->>Gitea: git push (main)
    Gitea->>Runner: Assign workflow job
    Runner->>Gitea: Checkout repository
    Runner->>Reg: docker login
    Reg-->>Runner: Authenticated
    Runner->>Runner: docker build (linux/arm64)
    Runner->>Reg: docker push gitea.rpi.home.arpa/user/app:sha
    Reg-->>Runner: Push OK
    Runner->>Dok: Deploy webhook (callback)
    Dok-->>Runner: 200 OK
    Note over Runner: Workflow completed

    Dok->>Reg: docker pull app:sha
    Reg-->>Dok: Image layers
    Dok->>Docker: Start new container
    Docker-->>Dok: Health check passed
    Dok->>Docker: Stop & prune old container
Hardware and OS#
I am using an 8 GB RAM Raspberry Pi 4 that I won in a CTF years ago, booting from an ordinary microSD card. I have two things to say about this:
- 8 GB of RAM. Dokploy wants at least 2 GB just to run comfortably and that’s before Gitea, Postgres, Gitea Runner, Traefik and your applications. Anything smaller than 4 GB willl probably spend its life swapping.
- The SD card is the weak point. Docker, Git and CI all mean a lot of writes which can wear out an SD card. Mine has been fine so far but I wouldn’t count on it forever. Use a decent A2-rated card, keep good backups (that’s an another headache) and move to a USB 3.0 SSD when the card eventually gives up. The Pi 4 can boot from USB with a recent bootloader (
sudo rpi-eeprom-update).
For the OS I used Raspberry Pi OS Lite (64-bit). No need to have desktop environment bloat. The 64-bit part matters: most of the container images publish linux/arm64 builds but not linux/arm/v7 so a 32-bit userland leaves you unable to run half of what you want. Check wwith this command:
# should print aarch64
uname -m
A few practical recommendations before you start:
- Use a case with a fan to avoid thermal throttling during long builds.
- Check temperatures with
vcgencmd measure_tempif builds start slowing down. - Use a non-root user with sudo.
- Disable password-based SSH login and use SSH keys only.
- Enable
unattended-upgradesfor automatic security updates if you want. - Set a static DHCP reservation so the Pi always has the same IP address.
Naming the Pi without a domain#
I don’t have a domain for this and the Pi isn’t reachable from the internet (thanks to CGNAT!!!). But Traefik routes the request by hostname. So we still need a name to give. I picked gitea.rpi.home.arpa and pointed at the Pi’s static IP address on my desktop.
# /etc/hosts on my desktop
<rpi-ip-address>  gitea.rpi.home.arpa app.rpi.home.arpa
In addition the hosts file on the Pi also needs to be edited. However since it is managed (at least for me) this must be done via /etc/cloud/templates/hosts.debian.tmpl.
.lan and .internal are safe choices for this but I recommend .home.arpa because it’s the standard for local networks. Avoid using .local which is claimed by mDNS. You’ll get confusing resolution failures.If you’d rather do this properly a local DNS server (Pi-hole, dnsmasq, or a router that supports custom entries) saves you from editing /etc/hosts on every device. I only have two machines, so I didn’t bother.
Installing Dokploy#
Dokploy is an open-source, self-hosted (also offers cloud plans) PaaS solution. Provides a web interface that allows you to deploy applications via Git or Docker Compose, while managing Traefik for routing and TLS, as well as handling certificate management.
To install:
curl -sSL https://dokploy.com/install.sh | sudo shWhen it finishes you can access the UI on:
http://<rpi-ip-address>:3000The first account you create becomes the admin.

Certificates with mkcert#
Dokploy supports Let’s Encrypt but this option is unavailable for me because there is no publicly accessible DNS. There is simply no way to complete the ACME validation process for a hostname defined only in my local /etc/hosts file. I could run everything over plain HTTP but registry work more smoothly with TLS.
mkcert solves this neatly. It creates a local certificate authority. Installs it into your system and browser trust stores and issues certificates signed by it. On the Pi:
sudo apt install mkcert
mkcert -install
mkcert gitea.rpi.home.arpa app.rpi.home.arpa "*.rpi.home.arpa"
This process generates a certificate and key pair in the current directory. Go to Settings -> Certificates in Dokploy, add a new certificate and paste the contents of both files there. Then, select this certificate instead of the Let’s Encrypt resolver for each domain name you have configured. Traefik will deploy the certificate immediately.
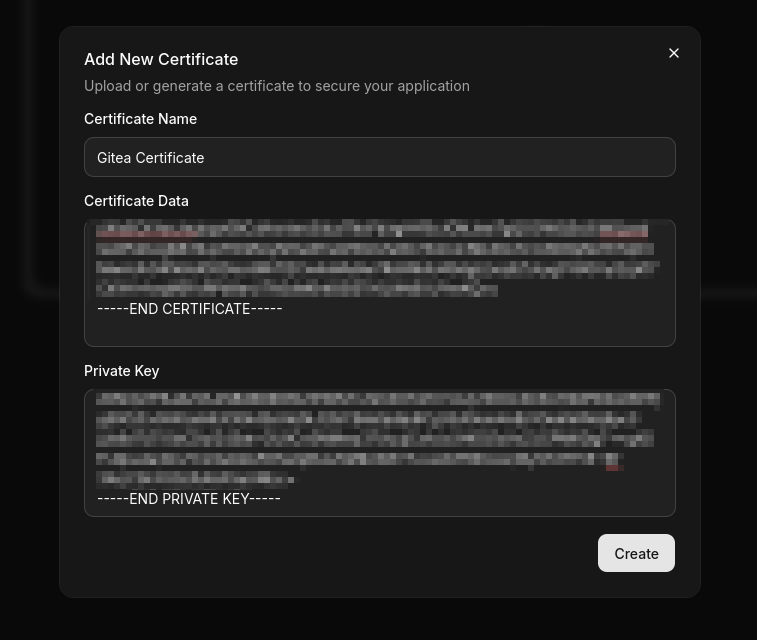
The other half of the job is making everything trust the CA. mkcert -CAROOT prints the directory holding rootCA.pem.
1. Your desktop, so that the browser and git accept the certificate.
Arch Linux#
# copy rootCA.pem over from the Pi first
sudo cp rootCA.pem /etc/ca-certificates/trust-source/anchors/mkcert-rpi.crt
sudo trust extract-compat
Debian / Ubuntu#
# copy rootCA.pem over from the Pi first
sudo cp rootCA.pem /usr/local/share/ca-certificates/mkcert-rpi.crt
sudo update-ca-certificates
2. The Pi’s system trust store, already handled by mkcert -install above, provided you ran it on the Pi. If you generated the certificate elsewhere, copy rootCA.pem over and run the same two commands there.
Deploying Gitea on Dokploy#
In Dokploy Home -> Projects -> Create Project after creating the project Create Service -> Compose
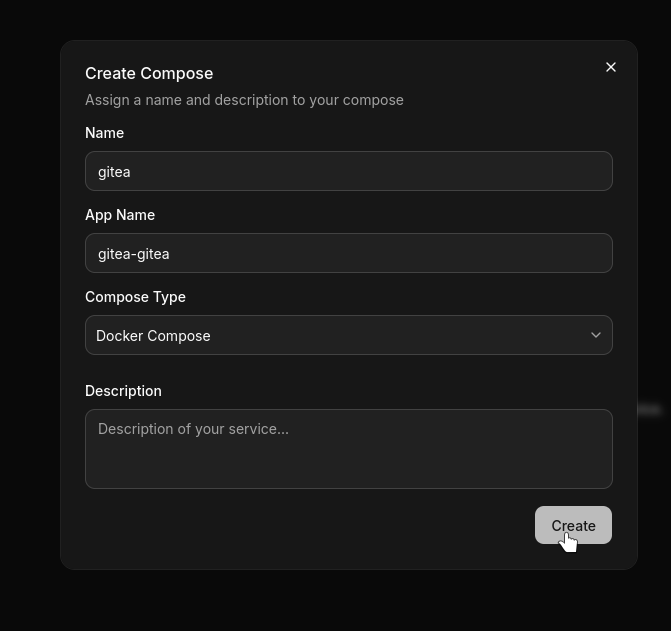
Then I wrote this compose:
services:
  gitea:
    image: gitea/gitea:1.27
    environment:
      - USER_UID=1000
      - USER_GID=1000
      - GITEA__database__DB_TYPE=postgres
      - GITEA__database__HOST=postgres:5432
      - GITEA__database__NAME=gitea
      - GITEA__database__USER=gitea
      - GITEA__database__PASSWD=${GITEA_DB_PASSWORD}
      - GITEA__server__ROOT_URL=https://gitea.rpi.home.arpa/
      - GITEA__server__SSH_DOMAIN=gitea.rpi.home.arpa
      - GITEA__server__SSH_PORT=2222
      - GITEA__actions__ENABLED=true
      - GITEA__service__DISABLE_REGISTRATION=true
    volumes:
      - gitea-data:/data
    ports:
      - "2222:22"
    depends_on:
      - postgres
    healthcheck:
      test: ["CMD", "wget", "-q", "--spider", "http://localhost:3000/"]
      interval: 15s
      timeout: 5s
      retries: 10
    restart: unless-stopped

  postgres:
    image: postgres:18.6-alpine
    environment:
      - POSTGRES_USER=gitea
      - POSTGRES_PASSWORD=${GITEA_DB_PASSWORD}
      - POSTGRES_DB=gitea
    volumes:
      - postgres-data:/var/lib/postgresql
    restart: unless-stopped

volumes:
  gitea-data:
  postgres-data:
A few notes on the choices:
gitea/giteaandpostgres:18.6-alpineboth publish multi-arch images, solinux/arm64works with no special handling.- Exposing SSH externally via port 2222. Port 22 on the host machine belongs to the Pi’s own sshd service. Routing Gitea’s SSH service to port 2222 and configuring the
SSH_PORTsetting accordingly ensures that the clone URLs displayed by Gitea are actually correct. DISABLE_REGISTRATION=truefrom the start. There is no reason to leave this enabled, even on a local network.ROOT_URLuses the hostname, not the IP. Gitea generates cloning URLs, webhook targets and registry paths based on this. If you configure this incorrectly, you will have to manually fix the URLs for later.
Define the environment variables under Environment tab.
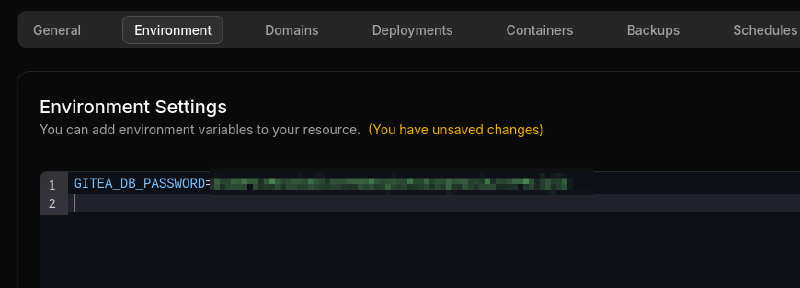
Next, add the domain name. But first clieck on Rebuild to build the compose. After that, in the Domains tab of the relevant stack in Dokploy, route gitea.rpi.home.arpa to the gitea service on port 3000, enable HTTPS and select None as provider. Dokploy will handle the rest.
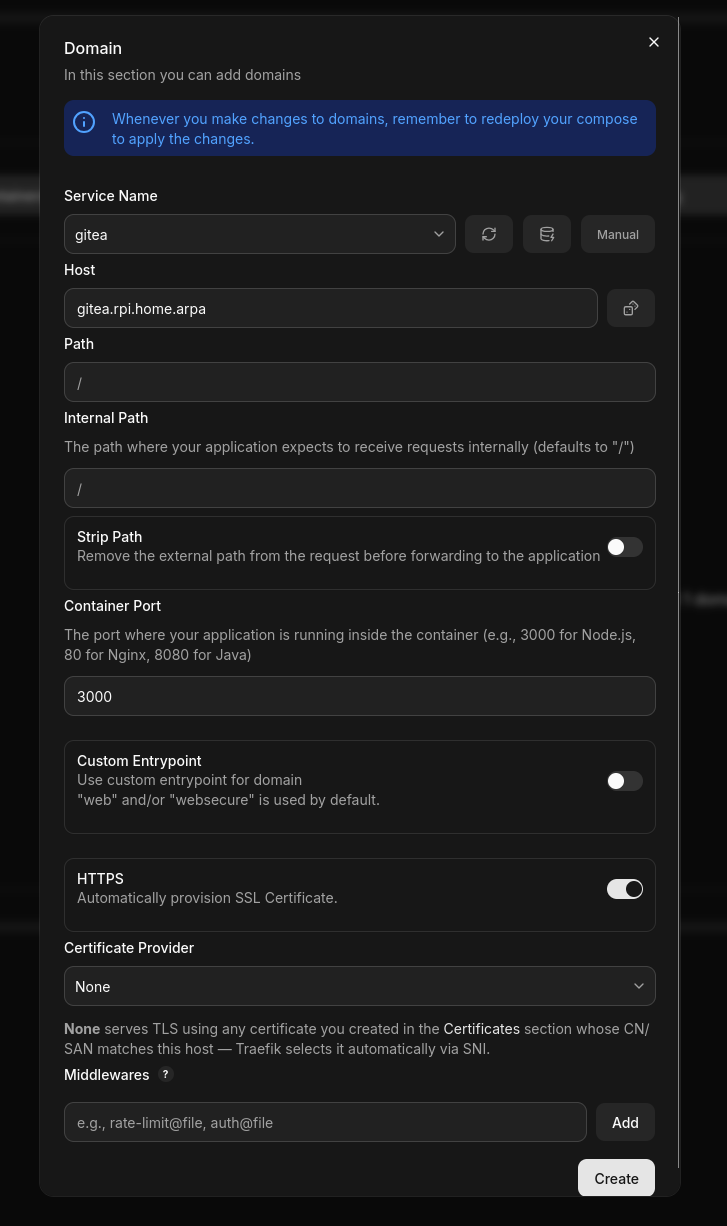
After creating domain, click Deploy to deploy Gitea.
Setting up the Gitea runner#
Gitea Actions is Gitea’s native CI system. Intentionally designed with a structure similar to GitHub Actions. Workflow YAML files are virtually identical and most actions from the marketplace work without any modifications. The only component not included within Gitea itself is the one that actually executes the jobs. This is a separate agent software that you register with your Gitea instance.
act_runner and shipped as gitea/act_runner. With Gitea Runner 1.0.0 it was renamed: the image is now gitea/runner and the binary is gitea-runner.Get a registration token from Site Administration -> Actions -> Runners -> Create new runner.
Then add the runner to the same Compose stack:
runner:
  image: gitea/runner:3.4
  environment:
    - CONFIG_FILE=/config.yaml
    - GITEA_INSTANCE_URL=http://gitea:3000
    - GITEA_RUNNER_REGISTRATION_TOKEN=${RUNNER_TOKEN}
    - GITEA_RUNNER_NAME=pi-runner
    - GITEA_RUNNER_LABELS=pi-arm64:docker://node:22-bookworm
  volumes:
    - ../files/config.yaml:/config.yaml
    - runner-data:/data
    - /var/run/docker.sock:/var/run/docker.sock
  depends_on:
    gitea:
      condition: service_healthy
      restart: true
  restart: unless-stopped
Don’t forget the volume:
volumes:
  gitea-data:
  postgres-data:
  runner-data:
Set the environment variable for runner:
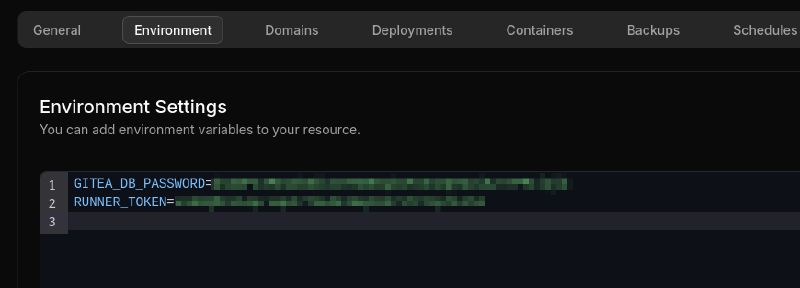
Two details matter here.
The Docker socket mount. The runner executes each job within a new container. Therefore it needs to communicate with the host’s Docker daemon. Mounting /var/run/docker.sock enables this. To be explicit about the trade-off involved: this method grants effective “root” (superuser) privileges on the host machine to any entity capable of running jobs on that runner. While this is acceptable for my own repositories on my own hardware, it would not be appropriate for a runner that accepts jobs from forks or untrusted contributors.
The labels. This is where most of my early failures came from. A label maps a workflow’s runs-on value to the container image the job runs in. The default set assumes ubuntu-latest and the images behind it aren’t always available for arm64. So a workflow copied from GitHub fails with a confusing manifest error before a single line of your code executes.
I sidestepped it by defining an arm64-native label and using it explicitly:
jobs:
  build:
    runs-on: pi-arm64
Runner needs a config file. Mount it in Dokploy, go to Advenced -> Volumes -> Add Volume and paste this:
log:
  level: info

runner:
  capacity: 1
  timeout: 2h

cache:
  enabled: false

container:
  network: dokploy-network
  privileged: false
  docker_host: ""
Name it as config.yaml:
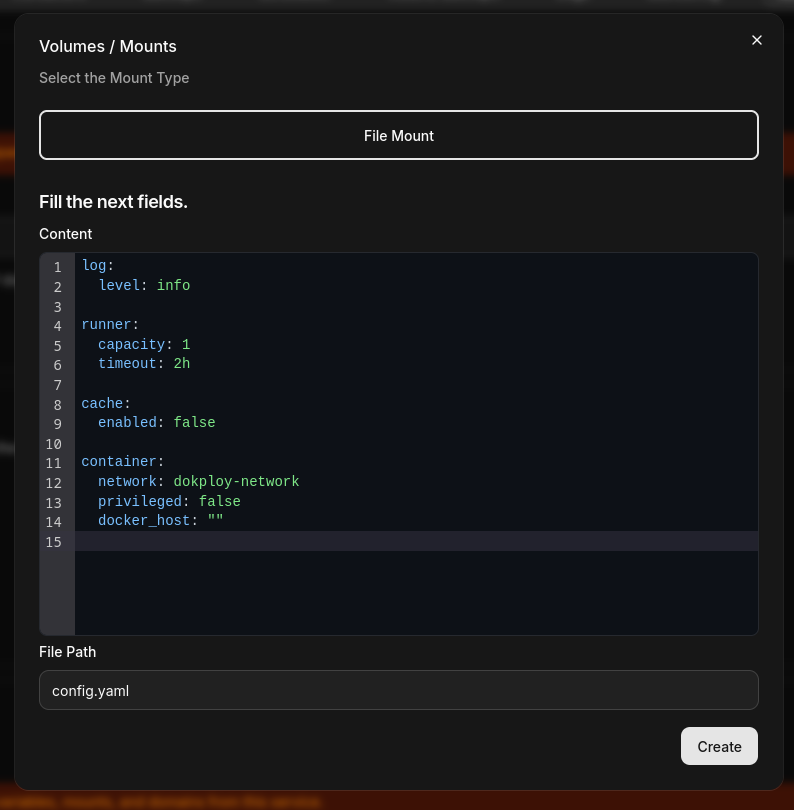
After that it’s ready to deploy.
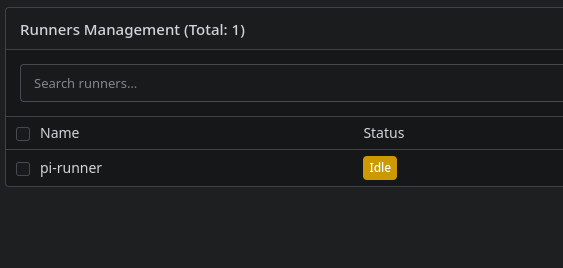
Once the container is up the runner should show as Idle under Actions -> Runners. If it doesn’t, docker logs on the runner container will tell you why.
The pipeline#
Once the runner is set up the workflow consists of a standard GitHub Actions flavoured YAML file. Mine is located at .gitea/workflows/deploy.yml and performs three tasks: building an image, pushing it to Gitea’s built-in registry and instructing Dokploy to redeploy.
Gitea ships a container registry as part of its package registry. So there’s no separate Harbor or Docker Registry to run. Pushing to gitea.rpi.home.arpa/<owner>/<image> just works once you’re authenticated. I use a Gitea access token with related permission scope rather than an account password, stored as a secret.
In Gitea, navigate to Settings -> Application -> Generate New Token. Give token a name, Select “Read and Write” for “package”. Click “Geneate Token” and copy the generated token.
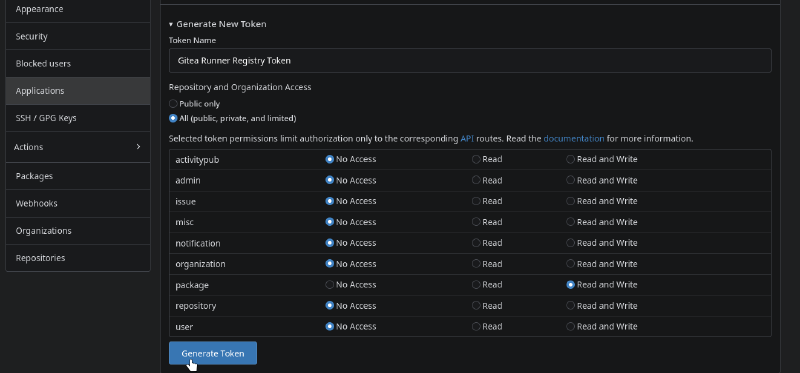
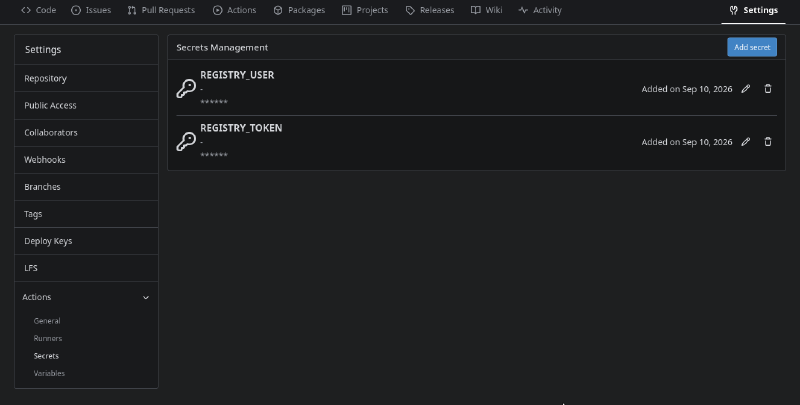
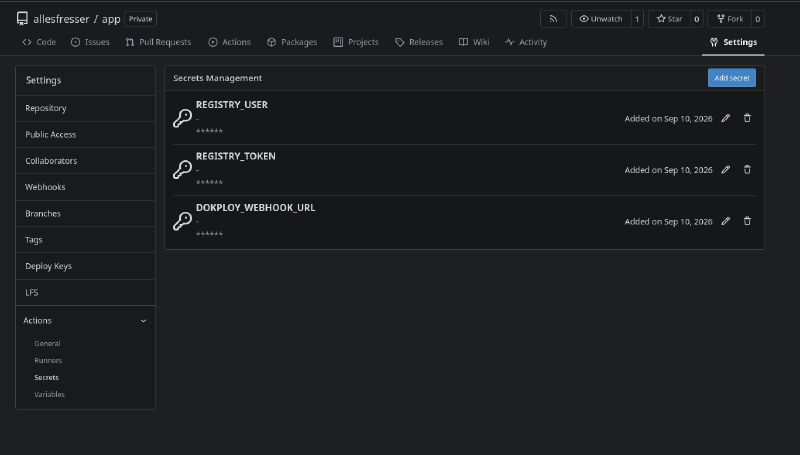
Then in related repository, go to Settings -> Actions -> Secrets. Click “Add secret” than paste it with the name REGISTRY_TOKEN. Also create another secret named REGISTRY_USER and set values as the username.
name: Build and Deploy

on:
  push:
    branches: [main]

env:
  DOCKER_VERSION: 29.7.2

jobs:
  build:
    runs-on: pi-arm64
    steps:
      - name: Docker CLI
        run: |
          set -eu
          if command -v docker >/dev/null; then exit 0; fi
          curl -fsSL "https://download.docker.com/linux/static/stable/aarch64/docker-$DOCKER_VERSION.tgz" \
            | tar -xzC /usr/local/bin --strip-components=1 docker/docker

      - name: Checkout
        uses: actions/checkout@v4

      - name: Log in to Gitea registry
        uses: docker/login-action@v4
        with:
          registry: gitea.rpi.home.arpa
          username: ${{ secrets.REGISTRY_USER }}
          password: ${{ secrets.REGISTRY_TOKEN }}

      - name: Build and push
        run: |
          docker build \
            -t gitea.rpi.home.arpa/<user>/app:latest \
            -t gitea.rpi.home.arpa/<user>/app:${{ github.sha }} .
          docker push gitea.rpi.home.arpa/<user>/app:latest
          docker push gitea.rpi.home.arpa/<user>/app:${{ github.sha }}

      - name: Trigger Dokploy deployment
        run: |
          curl -fsSL -X POST \
            -H 'Content-Type: application/json' \
            -H 'X-Gitea-Event: push' \
            --data '{"ref":"refs/heads/main"}' \
"${{ secrets.DOKPLOY_WEBHOOK_URL }}"node:22-bookworm image does not come with the Docker CLI pre-installed and the “push” operation failed to resolve the domain name I specified. Therefore, I overcame this issue by installing the Docker binary and manually building and pushing the image.By using Dokploy’s Auto Deploy Webhook URL, a new deployment can be triggered every time the pipeline runs. The only necessary step is to write dokploy directly instead of the IP address in the URL:
http://<rpi-ip-address>:3000/api/deploy/compose/<token> -> http://dokploy:3000/api/deploy/compose/<token>DOKPLOY_WEBHOOK_URL.Secrets used in the pipeline must be defined in Gitea. They can be defined by navigating to Repository -> Settings -> Actions -> Secrets.
Deploying Application#
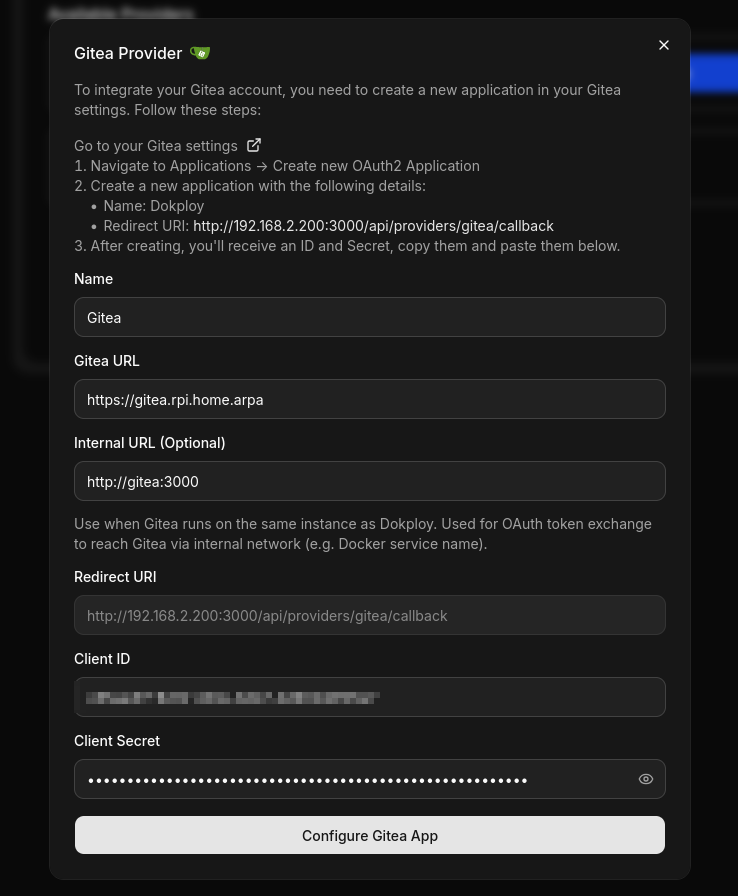
To deploy application on Dokploy I used Gitea integration method.
Go to Settings -> Git -> Gitea. Afterward, the integration can be completed by following Dokploy’s instructions.
Afterwards the application project can be created on Dokploy.
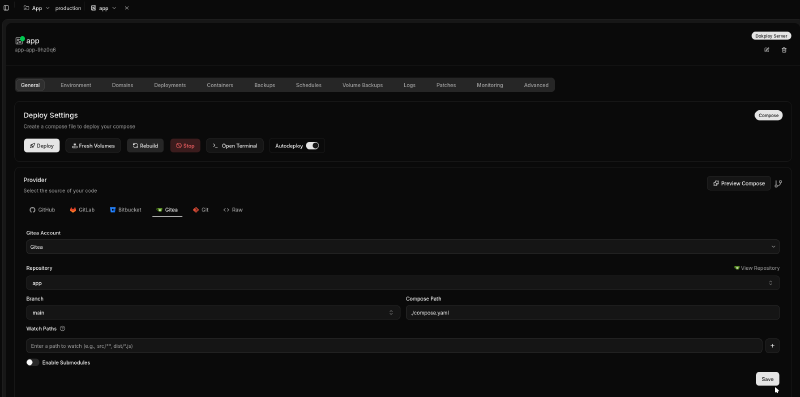
I kept the Docker Compose file required to deploy the project on Dokploy directly in the project repository.
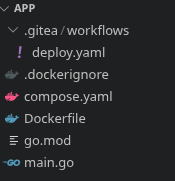
services:
  app:
    image: gitea.rpi.home.arpa/<user>/app:latest
    restart: unless-stopped
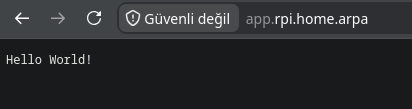
Once all these steps are completed, you have a fully functional application that automatically deploys on every push to the main branch.
Was it worth it?#
For me, yes… With a few caveats.
The good part is that a push triggers a build within few minutes because there’s no queue. There are no build minutes to worry about, and private repositories are actually private since the hardware is sitting in my flat. The whole setup is also just one Compose file, so when something breaks, I can usually figure out what went wrong.
The downside is that builds are slower than hosted runners especially for CPU heavy projects. Rust builds are probably the biggest pain here. Some of them take a surprisingly long time on this little machine. The LAN only setup also means CI is unreachable when I’m away from home unless I set up a VPN or a tunnel. And if anything goes wrong I’m the one who has to deal with it.
For larger projects or if your time is worth more than the cost of a CI service this probably isn’t worth it.
But for a handful of small services, a personal Git server and the satisfaction of watching a credit card sized computer build and deploy your own software, it’s hard to beat.
If you build something similar and run into a problem I haven’t covered here, I’d be happy to hear about it.